Author: admin

  • How to make Cow Mat ?? Step by step process

    How to make Cow Mat ?? Step by step process

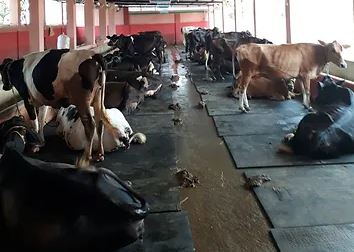
    Here’s a clear step-by-step process for making cow mats (rubber mats used in dairy farms for cattle comfort and hygiene). These mats are typically made from natural or synthetic rubber blends, designed to be durable, non-slip, and easy to clean.

    🛠 Materials Needed

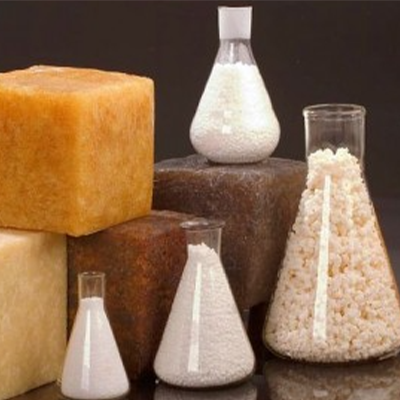
    • Natural rubber or synthetic rubber (SBR, EPDM, or recycled rubber)
    • Fillers (carbon black, silica, clay, Calcium Carbonate)
    • Plasticizers (to improve flexibility, like Zinc Oxide, Zinc Stearate)
    • Vulcanizing agents (sulfur, accelerators, DCP, BIPB)
    • Pigments (optional, for color)
    • Blowing Agent [ ADC, AC. DNPT]
    • Moulds (steel moulds with cow mat design)
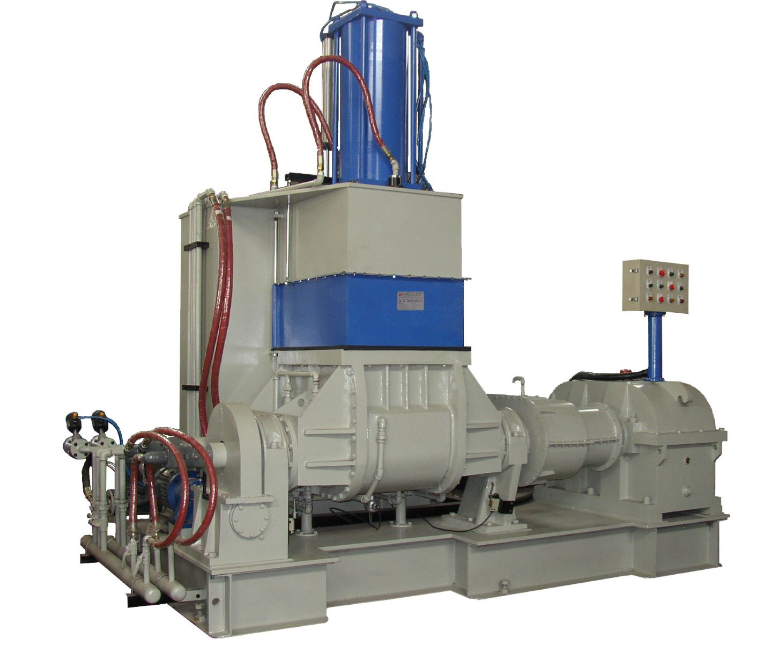
    • Hydraulic press or compression moulding machine
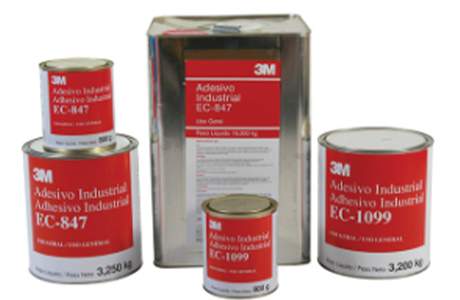
    • Mould release agent as Silicon Emulsion.

    A Cow Mat Making Formula:01

    SL NoChemicalsQuantity-Kg
    1Natural Rubber15
    2Calcium Carbonate5
    3China Clay12
    4EVA Recycle60
    5Zinc Oxide0.500
    6Stearic Acid0.800
    7Carbon Black2
    8Waste Oil/Naphthnic3
    9Blowing Agent2.200
    10DCP0.320
    Total100.820

    There are lots Formula.

    Cow Mat Making Formula:02

    SL NoChemicalsQuantity-Kg
    1EVA12
    2Calcium Carbonate10
    3China Clay10
    4EVA Recycle55
    5Zinc Oxide0.800
    6Stearic Acid1.000
    7Carbon Black2
    8Waste Oil/Naphthnic3
    9Blowing Agent2.150
    10DCP0.300
    Total96.250

    EVA Recycle is most important:

    Below is recycle video:

    ⚙️ Step-by-Step Manufacturing Process

    1. Raw Material Preparation

    • Collect rubber (natural or synthetic).
    • Grind recycled rubber sheets or crumb rubber if using waste material.
    • Weigh and prepare fillers, plasticizers, and curing agents.

    2. Mixing

    • Mix rubber with fillers, plasticizers, and curing agents in a Banbury mixer or open mill.
    • Ensure uniform blending for strength and elasticity.
    • The compound should be homogeneous and free of lumps.
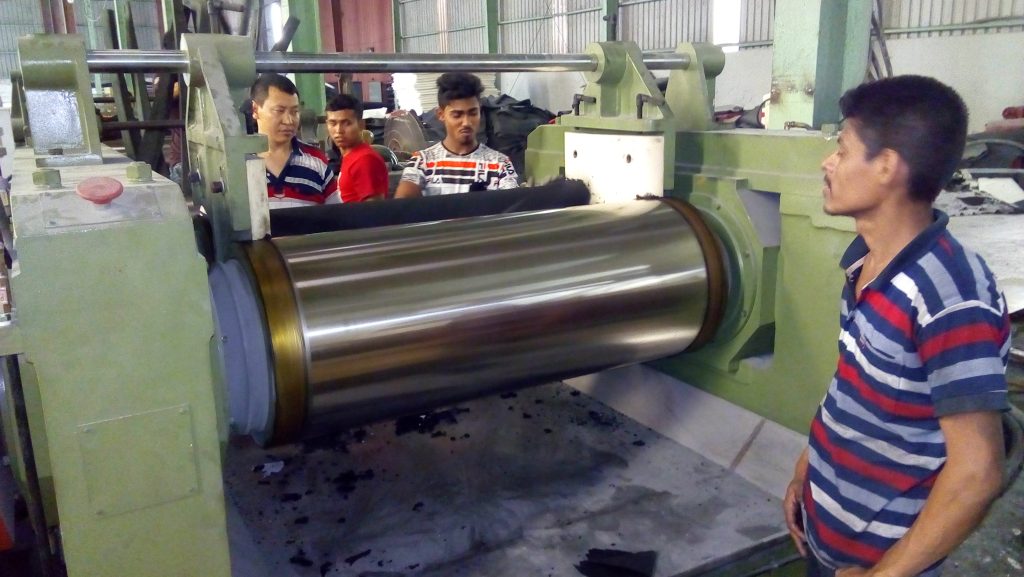
    3. Sheet Formation

    • Pass the mixed compound through a two-roll mill to form sheets.
    • Cut sheets into required sizes for moulding.

    4. Mould Preparation

    • Clean and preheat steel moulds.
    • Apply mould release agent to prevent sticking.

    5. Moulding & Vulcanization

    • Place rubber sheets into mould cavities.
    • Use a hydraulic press for compression moulding.
    • Apply heat (around 140–160°C) and pressure for 10–20 minutes.
    • Vulcanization cross-links the rubber, giving durability and elasticity.

    6. Cooling & Demoulding

    6. Cooling & Demoulding

    • Remove moulds from press and allow them to cool.
    • Demould the cow mats carefully.

    7. Finishing

    • Trim excess edges.
    • Inspect for defects (air bubbles, cracks).
    • Wash and polish if needed.

    8. Quality Testing

    • Check hardness, tensile strength, and anti-slip properties.
    • Ensure mats are flexible yet strong.

    9. Packaging

    • Stack mats flat.
    • Pack in bundles for shipment.

    ✅ Key Features of Good Cow Mats

    • Non-slip surface for cattle safety
    • Soft yet durable for comfort
    • Easy to clean and resistant to chemicals
    • Long lifespan (5–10 years depending on use)
  • How to make Neoprene & Graft Adhesive?

    How to make Neoprene & Graft Adhesive?

    Neoprene Adhesive
#Glue
Adhesive uses many more applications like footwear sole attachment, engineering works etc.

    Neoprene adhesive is a type of strong and flexible glue that is commonly used to bond neoprene rubber to various materials like EVA sheet, rubber sheet, sole, and other materials. Neoprene is a synthetic rubber that is resistant to water, oil, and chemicals, making it ideal for bonding applications. Making neoprene adhesive involves combining specific ingredients to create a mixture that will adhere well to neoprene and other surfaces. Here’s a basic recipe to make neoprene adhesive:

    Ingredients: Neoprene Adhesive Formula-01

    SL-NoIngradientsQuantity-Kg
    1Toluene875
    2SBPs470
    3MgO5
    4Petrocin Resin48
    5Phenolic Resin55
    6Denka, A-9061
    7Denka, M-40184
    Antioxident- BHTAntioxidant- BHT1.200
    Total1699.2

    Solvent: A solvent is needed to thin the neoprene cement and improve its spreadability. Toluene is a commonly used solvent for

    this purpose.

    Safety Precautions:

    Work in a well-ventilated area to avoid inhaling fumes.

    Wear gloves and eye protection to prevent contact with the adhesive.

    Keep the adhesive away from open flames or sparks, as the solvent is flammable.

    Instructions:

    Measure the ingredients: Pour the desired amount of neoprene cement base into a clean, empty container. The amount you use will depend on the size of the bonding job.

    Add solvent: Add a small amount of solvent (toluene) to the neoprene cement base. The exact ratio of solvent to neoprene cement will vary depending on the manufacturer’s recommendations and the desired consistency of the adhesive. Typically, a 5:1 ratio of neoprene cement to solvent is a good starting point. Mix the solvent and neoprene cement together thoroughly.

    Mix well: Stir the mixture well to ensure the solvent and cement are fully combined. Make sure there are no lumps or inconsistencies in the mixture.

    Test the adhesive: Before using the neoprene adhesive on your actual project, it’s a good idea to do a test application on a small piece of neoprene or scrap material to check its effectiveness.

    Apply the adhesive: Using a brush or a small applicator, spread a thin, even layer of the neoprene adhesive on both surfaces that you want to bond. Apply the adhesive to both the neoprene rubber and the material you want to attach it to.

    Allow drying time: Let the adhesive dry for the time specified by the manufacturer. It is essential to follow the recommended drying time to ensure a strong and lasting bond.

    Press the surfaces together: Once the drying time is complete, press the neoprene and the other material together firmly to create a strong bond. Use clamps or weights if needed to hold the pieces in place while the adhesive fully cures.

    Curing time: The curing time may vary depending on the specific adhesive used, but it typically takes 24 hours for the bond to reach full strength.

    Please note that the specific steps and materials required may vary depending on the type and brand of neoprene adhesive you use. Always follow the manufacturer’s instructions and safety guidelines for the best results and to ensure proper bonding.

    Neoprene cement base: This can be purchased from a hardware store or online. It is specifically formulated for bonding neoprene rubber.

  • How to make EVA Sheets Step-by-Step Process :

    How to make EVA Sheets Step-by-Step Process :

    Welcome to Rubber Bazaar. This is a Practical lesson that describes the above article.

    The manufacturing process of EVA (Ethylene Vinyl Acetate) sheets typically involves several steps. Here is a general outline of the process:

    Material Preparation: The raw materials needed for EVA sheet production are ethylene and vinyl acetate. These materials are measured and mixed in the desired proportions. Various additives such as colorants, stabilizers, and foaming agents may also be added at this stage.

    Types or Classes of the Raw Materials for EVA foaming sheet making:

    This is an EVA sheet, making a video:

    Polymers: EVA, LDPE, POE, Natural Rubber etc.

    Fillers: Calcium Carbonate, Recycle of EVA sheets, China Clay, Talk Powder etc.

    Activators: Zinc Oxide

    Lubricants: Stearic Acid

    Curing agent : DCP[ Dicumyl peroxide]

    Blowing agent: AC [ Azo di carbon amide]

    Colours: Red, Blue, Yellow, Carbon Black, Titanium dioxide etc

    Mould release Agent : Silicon Oil

    Example of EVA sheet Formula:

    The manufacturing process of EVA (Ethylene Vinyl Acetate) sheets typically involves several steps. Here is a general outline of the process:

    Material Preparation: The raw materials needed for EVA sheet production are ethylene and vinyl acetate. These materials are measured and mixed in the desired proportions. Various additives such as colorants, stabilizers, and foaming agents may also be added at this stage.

    Formula-01

    SL NoName of IngredientsQuantity[kg]
    1EVA[Ethylene Vinyl Acetate]25
    2LDPE25
    3Zinc Oxide[99%]0.8
    4Stearic Acid1.2
    5DCP[ Dicumyl peroxide]0.5
    6AC [ Azo di carbon amide]2.5
    7Colours say Red1.2
    8Calcium Carbonate25
    Total=81.2

    Formula-02

    SL NoName of IngredientsQuantity[kg]
    1EVA[Ethylene Vinyl Acetate]50
    2Calcium Carbonate25
    3Zinc Oxide[99%]0.8
    4Stearic Acid1
    5DCP[ Dicumyl peroxide]0.5
    6AC [ Azo di carbon amide]2.5
    7Colours say Red1.2
    Total=81

    Formula-03

    SL NoName of IngredientsQuantity[kg]
    1EVA[Ethylene Vinyl Acetate]5
    2LDPE25
    3POE5
    4Calcium Carbonate15
    5, Recycle of EVA sheets25
    6Zinc Oxide[99%]0.6
    7Stearic Acid0.8
    8DCP [ Dicumyl peroxide]0.35
    9AC [ Azo di carbon amide]2.4
    10Colours as required say Red1
    11Total=80.15

    Note: DCP & AC Adjustable for sheet hardness. Recycle match by colour.

    Instrusion: The mixed materials are then fed into an extruder name Kneader Machine which melts and homogenizes them. The extruder is a machine with a heated barrel and a screw that pushes the molten mixture through a die. The die has a specific shape and size, determining the thickness and width of the EVA sheet. The Mixing Temperature up to 1150C to 1200C .

    Cooling and Calendering: After the extrusion process, the molten EVA sheet passes through a series of chilled rollers or a cooling bath. This rapid cooling solidifies the material and helps maintain its desired dimensions. The sheet is then fed through calendering rollers, which smooth and flatten its surface, ensuring uniform thickness.